
 WhatsApp: +86 16626708626
 Email:
  Phone: +86 16626708626
Description
Key Technical Specifications
| Parameter | Value |
|---|---|
| Model | E84AHWMC1534V-V003 |
| Manufacturer | Lenze |
| Product Family | 8400 HighLine |
| Product Type | Frequency inverter / drive |
| Rated Motor Power | 1.5 kW |
| Supply | 3 × 400/480 VAC, ±10% |
| Output Current | 3.4 A |
| Output Frequency | 0–500 Hz |
| Control Modes | V/f; sensorless vector; motion/servo-oriented control |
| Communication | CANopen; additional communication options depend on configuration |
| Safety Function | STO reported on applicable configuration |
| Protection Class | IP20 |
| Cooling | Forced air |
| Mounting | Book-style / side-by-side cabinet mounting |
| Dimensions | Approximately 270 × 90 × 195 mm |
| Weight | Approximately 3.4 kg |
| Hardware Revision | V003 |
The above electrical figures come primarily from a current third-party 8400 HighLine listing.
Verification note: Another listing describes the same part number as an “8400 Series Hardware Module” rather than a complete frequency inverter, while a separate listing incorrectly describes it as an E84-series synchronous servo motor. These discrepancies make it unsafe to infer the complete drive specification from the part number alone.
Product Introduction
The Lenze E84AHWMC1534V-V003 is associated with the Lenze 8400 HighLine drive platform. Available product records describe it as a 1.5 kW-class frequency inverter with a 3.4 A output rating and 400/480 VAC three-phase supply.
For a replacement, the critical checks are not just the model number. Confirm the complete nameplate, power rating, mains voltage, output current, hardware revision, control configuration, and installed communication options. The V003 suffix should be matched when the existing machine depends on a particular hardware revision.
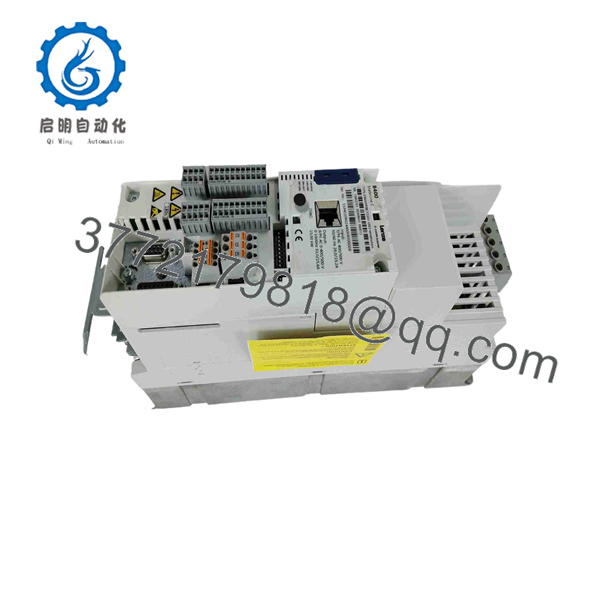
E84AHWMC1534V-V003
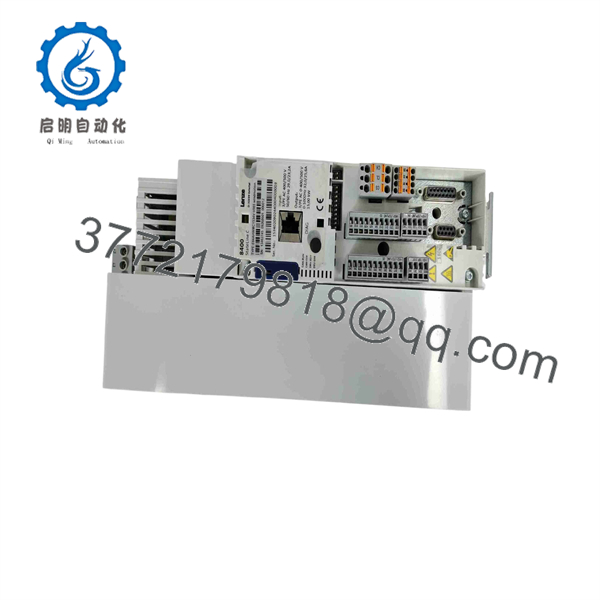
E84AHWMC1534V-V003
Installation & Configuration Guide
Stage 1: Pre-Installation Preparation — 10–15 minutes
⚠️ Safety First: This is a mains-powered variable-frequency drive. Isolate the incoming AC supply using the plant’s LOTO procedure and verify absence of voltage before touching terminals. Allow the DC bus to discharge according to the Lenze service procedure; do not assume that the bus is safe immediately after power removal.
Tools Required:
- CAT-rated multimeter
- ESD protection for control electronics
- Insulated screwdriver set
- Wire labels
- Smartphone/camera
- Lenze commissioning software and appropriate interface, if required
- Existing parameter/configuration backup
Before removing the existing unit:
- Record the exact drive model and suffix.
- Photograph the nameplate and terminal arrangement.
- Record incoming mains connections.
- Record motor U/V/W wiring and PE connection.
- Photograph communication wiring and option modules.
- Record node address and communication settings.
- Back up drive parameters where the existing configuration allows it.
- Record motor data, including rated voltage, current, frequency, speed, and power.
⚠️ Do not assume that another 8400 drive with the same power rating is automatically interchangeable. Hardware revision and option/configuration differences can matter.
Stage 2: Removing the Old Drive — 10 minutes
- Stop the machine using the normal shutdown sequence.
- Apply LOTO to the drive supply.
- Verify the absence of dangerous voltage with an appropriate meter.
- Wait the manufacturer’s specified DC-bus discharge period.
- Verify the DC bus is actually discharged before proceeding.
- Photograph every terminal before disconnecting wiring.
- Label all power, motor, brake, control, and communication conductors.
- Disconnect the wiring without pulling on terminal blocks or PCB-mounted connectors.
- Release the cabinet mounting hardware.
- Remove the drive while supporting its weight.
⚠️ Keep the original drive until commissioning is complete. Its parameter memory, wiring, and nameplate may be required to resolve a configuration mismatch.
Stage 3: Installing E84AHWMC1534V-V003 — 10–15 minutes
- Verify the replacement model and V003 revision.
- Confirm the cabinet mounting dimensions.
- Install the drive with the required mechanical clearances.
- Confirm airflow around the cooling path.
- Reconnect protective earth first.
- Reconnect incoming power conductors.
- Reconnect motor U/V/W and PE.
- Reconnect control and communication wiring.
- Verify that no conductor has been trapped beneath a terminal clamp.
- Check all power connections before energizing.
Configuration Clone — Critical:
- Copy motor-rated voltage.
- Copy motor-rated current.
- Copy motor-rated frequency.
- Copy rated speed.
- Copy acceleration/deceleration values.
- Copy minimum/maximum frequency.
- Copy control mode.
- Copy communication address.
- Copy fieldbus configuration.
- Copy safety-related configuration where applicable.
Self-Checklist:
- Exact model verified
- V003 revision verified
- PE connected
- Mains wiring checked
- Motor wiring checked
- Control wiring checked
- Communication settings documented
- Parameters backed up
- Cooling path unobstructed
Stage 4: Power-On & Commissioning — 15–30 minutes
- Energize the drive without immediately enabling the motor.
- Check the display/status indicators.
- Verify that no overvoltage, undervoltage, overcurrent, or communication fault appears.
- Connect the Lenze commissioning environment if required.
- Confirm the loaded parameter set.
- Verify motor nameplate data.
- Confirm the command source and speed reference source.
- Jog the motor at low speed.
- Confirm rotation direction.
- Test acceleration and deceleration at reduced values.
- Verify the PLC/fieldbus command path.
- Return the machine to automatic operation only after the local test passes.
⚠️ If the motor runs in the wrong direction, stop the test rather than compensating blindly in the PLC. Determine whether the direction is controlled by motor phase sequence, drive configuration, or the machine’s motion program.
⚠️ If the drive trips immediately on enable, check the motor data and current limit first. Do not repeatedly reset the fault without identifying its cause.
Frequently Asked Questions (FAQ)
What is the E84AHWMC1534V-?
Current supplier records identify it with the Lenze 8400 HighLine drive family and describe it as a frequency inverter. One listing gives a 1.5 kW rating and 3.4 A output current.
Is E84AHWMC1534V- a servo motor?
The available evidence does not support treating this part number as a servo motor. One reseller incorrectly categorizes it as an E84-series synchronous servo motor, while other sources identify the exact part number with the Lenze 8400 HighLine inverter family. For purchasing and replacement purposes, verify the physical nameplate and Lenze documentation rather than relying on a reseller’s product category.
What motor power is associated with this model?
A current 8400 HighLine listing specifies 1.5 kW and 3.4 A output. Those values should be verified against the actual unit before commissioning because the public documentation for this exact suffix is inconsistent.
What input voltage does it use?
The same listing specifies 3 × 400/480 VAC ±10%. Confirm the actual nameplate before applying power, particularly when replacing a legacy drive in a mixed-voltage cabinet.
Can I replace another Lenze 8400 drive with this unit?
Not solely because both units belong to the 8400 family. Compare rated power, output current, mains voltage, hardware revision, control functions, option modules, communication configuration, and parameter compatibility. A mechanically compatible replacement can still require substantial commissioning work.
What does the suffix mean?
Available product information identifies as a hardware revision. When replacing an installed unit, record the complete suffix rather than ordering only the base E84AHWMC1534V designation.
Is this a current-production Lenze part?
The sources reviewed confirm that the exact part number continues to appear in industrial spare-parts listings, including current 2026 marketplace listings, but they do not establish current OEM production status. One marketplace listing currently advertises the exact unit as new stock. For procurement, request a photograph of the actual nameplate, serial number, condition, and hardware revision before treating a quoted unit as a like-for-like replacement.



