
 WhatsApp: +86 16626708626
 Email:
  Phone: +86 16626708626
Description
Key Technical Specifications
| Parameter | Value |
|---|---|
| Manufacturer | National Instruments |
| Model | PXI-6025E |
| Product Family | E Series |
| Product Type | PXI Multifunction I/O / DAQ Module |
| Analog Inputs | 16 single-ended or 8 differential |
| Analog Input Resolution | 12 bit |
| Maximum Sampling Rate | 200 kS/s |
| Analog Outputs | 2 |
| Digital I/O | 32 channels |
| Counters | 2 × 24-bit |
| I/O Connector | 100-pin female 0.05D type |
| Operating Temperature | 0 to 55 °C |
| Storage Temperature | −20 to 70 °C |
| Power Requirement | +5 VDC, 0.7 A |
| Module Dimensions | 16.0 × 10.0 cm |
| Weight | Approximately 202 g |
| Driver Support | NI-DAQ / NI-DAQmx depending on software version |
| PXI Interface | PXI |
NI’s family specification confirms 16 single-ended or 8 differential analog inputs, 12-bit conversion, and a 200 kS/s guaranteed sampling rate. The NI manual specifies the 100-pin connector, 0–55 °C operating range, +5 VDC/0.7 A power requirement, and 16.0 × 10.0 cm PXI module dimensions.
Product Introduction
The National Instruments PXI-6025E is an E Series PXI multifunction data-acquisition module combining analog input, analog output, digital I/O, and counter functions. It provides 16 analog inputs at up to 200 kS/s, 2 analog outputs, 32 digital I/O channels, and two 24-bit counters.
This module was designed for laboratory automation, research, design verification, and manufacturing test systems. NI now lists the PXI-6025E as no longer available, so existing-system maintenance typically requires sourcing a tested legacy unit or evaluating NI’s suggested replacement, the PXIe-6341.
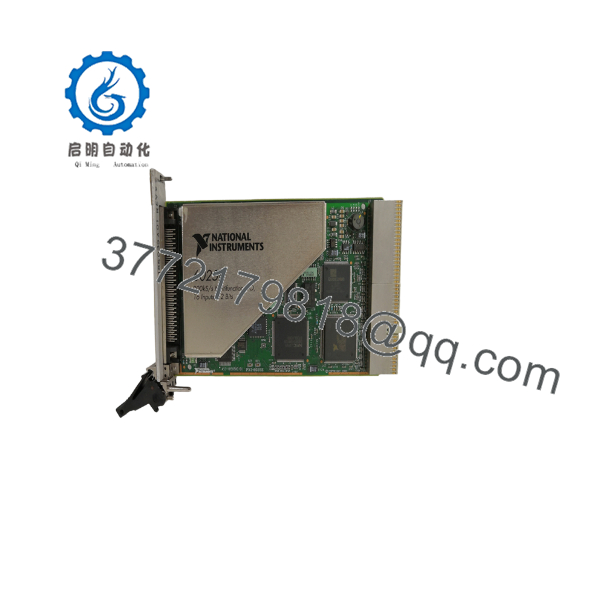
PXI-6025E
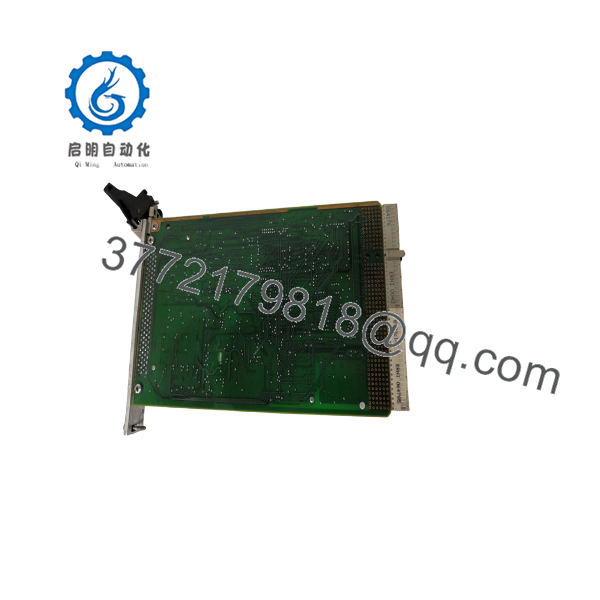
PXI-6025E
Installation & Configuration Guide
Stage 1: Pre-Installation Preparation — Approximately 5 minutes
⚠️ Safety First: Power down the PXI chassis according to the chassis manufacturer’s procedure before removing the module. Follow site ESD controls when handling the board.
Tools Required:
- ESD wrist strap
- Phillips screwdriver
- Digital multimeter
- PXI chassis documentation
- 100-pin cable/accessory documentation
- Smartphone or camera
Data Backup:
- Record the PXI-6025E serial number and hardware revision.
- Document the PXI chassis slot containing the module.
- Record the NI-DAQmx/NI-DAQ software version.
- Photograph the 100-pin connector and cable routing.
- Export the applicable DAQ task/configuration.
- Record channel assignments, voltage ranges, sampling rates, and trigger settings.
⚠️ The PXI-6025E is a legacy E Series device. Software compatibility matters as much as physical compatibility when replacing one in an older test system.
Stage 2: Removing the Old Module — Approximately 5 minutes
- Shut down the acquisition application.
- Power down the PXI chassis.
- Wait for the chassis to discharge according to its service procedure.
- Disconnect the external I/O cable.
- Remove the front-panel mounting screws.
- Release the PXI module ejector handle.
- Pull the PXI-6025E straight out of the chassis slot.
- Inspect the connector and backplane for contamination or physical damage.
⚠️ Do not force the module out. A damaged PXI connector or backplane can turn a simple DAQ replacement into a chassis-level repair.
Stage 3: Installing the New Module — Approximately 5 minutes
- Attach the ESD wrist strap.
- Verify that the replacement is specifically , not PCI-6025E or another E Series model.
- Inspect the connector for bent or contaminated contacts.
- Insert the module into the same PXI slot.
- Engage the ejector handle to seat the board.
- Tighten the front-panel mounting screws.
- Reconnect the 100-pin I/O cable.
- Verify that the cable is fully seated and secured.
Self-Checklist:
- model verified
- Serial/hardware revision recorded
- Correct PXI slot used
- 100-pin connector seated
- Front-panel screws secured
- ESD precautions maintained
- DAQ configuration backed up
Stage 4: Power-On & Testing — Approximately 10–15 minutes
- Power on the PXI chassis.
- Start the applicable NI software environment.
- Confirm that the is detected.
- Verify the device name/resource assignment.
- Check the installed driver/software compatibility.
- Verify analog-input channel configuration.
- Test one known analog signal before enabling the full acquisition task.
- Verify analog-output channels using an appropriate load or measurement instrument.
- Test digital I/O channels at safe signal levels.
- Verify counter operation if counters are used.
- Run the original acquisition task.
- Compare measured values against the pre-replacement baseline.
NI documentation identifies NI-DAQmx as a supported configuration/measurement environment for the , while older systems may depend on legacy NI-DAQ software.
⚠️ Do not assume a modern driver installation will reproduce the behavior of an old E Series test application. Check the application’s NI-DAQ/NI-DAQmx dependency before changing the software environment.
Frequently Asked Questions (FAQ)
Is the NI obsolete?
Yes. National Instruments currently lists the as “No longer available.” NI’s current page identifies the PXIe-6341 as its suggested replacement.
What are the main I/O specifications of the ?
The module provides 16 analog inputs, 2 analog outputs, and 32 digital I/O channels, with a maximum analog-input sampling rate of 200 kS/s. It also includes two 24-bit counters.
Is the 12-bit or 16-bit?
The ‘s analog input ADC resolution is 12 bit. Do not confuse it with newer PXI/PXIe DAQ modules that offer 16-bit conversion.
Can I replace directly with PXIe-6341?
Not as a blind hardware swap. NI lists the PXIe-6341 as a suggested replacement, but it is a PXIe device with different hardware characteristics. Existing software, chassis compatibility, connector accessories, channel assignments, timing, and application code must be evaluated before migration.
What connector does use?
The uses a 100-pin female 0.05D connector. The cable and terminal accessories should therefore be checked carefully when replacing a module in an existing test rack.
What is the operating temperature range?
The documented operating range is 0 to 55 °C, with 10–90% relative humidity, noncondensing. The storage temperature range is −20 to 70 °C.
What should I verify when purchasing a replacement ?
For a legacy test system, verify the exact model, serial number, hardware revision, physical condition, connector condition, calibration status, and driver compatibility. If buying refurbished or used equipment, request an actual functional test report rather than relying on a power-on guarantee. NI itself provides calibration and support resources for the model, although the product is no longer available for new purchase.



