
 WhatsApp: +86 16626708626
 Email:
  Phone: +86 16626708626
Description
- Key Technical Specifications
| Parameter | Specification |
| Product Model | MSMA041A1E |
| Manufacturer | Panasonic Industry |
| Series | MINAS A Series |
| Rated Output Power | 400 W (0.4 kW) |
| Input Voltage | 100 V AC (3-Phase / Single-Phase matched driver) |
| Rated Speed | 3000 RPM |
| Max Speed | 5000 RPM |
| Rated Torque | 1.27 N·m |
| Peak Torque | 3.82 N·m |
| Rotor Inertia | Low Inertia (0.26 \times 10^{-4} kg\cdotm^2) |
| Feedback Device | 17-bit (131,072 p/rev) Incremental Encoder |
| Shaft Specification | Straight shaft with keyway |
| Brake Option | Without holding brake |
| IP Rating / Protection | IP65 (excluding shaft pass-through) |
| Weight | 1.4 kg (3.08 lbs) |
- Product Introduction
The Panasonic MSMA041A1E is a 400W AC servo motor belonging to the legacy MINAS A family. Built with a low-inertia rotor, this motor excels in high-dynamics applications requiring rapid acceleration and deceleration cycles, such as SMT component placement, high-speed sorting, packaging machinery, and light CNC axis motion.
Designed to operate seamlessly with matched Panasonic MINAS A-series drivers (such as MSDA041A1A), the MSMA041A1E utilizes an integrated high-resolution incremental encoder to provide tight position loop control. Its compact frame footprint and robust IP65 enclosure allow reliable installation directly inside cramped mechanical assemblies subjected to ambient dust and moisture.
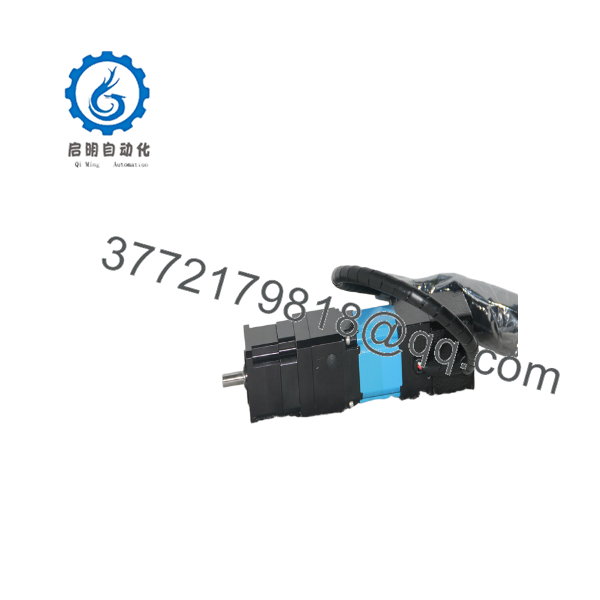
MSMA041A1E
- Installation & Configuration Guide
Stage 1: Pre-Installation Preparation (Estimated Time: 10 Minutes)
- ⚠️ Safety First: Isolate power from the matching servo drive. Lock out and tag out the main breaker. Verify zero voltage across motor power terminals U, V, and W using a digital multimeter before touching wiring.
- Tools Required: ESD wrist strap, metric Allen key set, torque wrench, wire labels, Fluke 115 multimeter, Megger insulation tester (500V DC).
- Data Backup: Photograph the motor nameplate and confirm shaft coupling dimensions match mechanical drawings. Document driver parameter settings if replacing after an encoder fault.
Stage 2: Removing the Old Motor (Estimated Time: 15 Minutes)
- Disconnect the power extension cable and encoder connector. Unclip locking levers carefully to prevent cracking aged plastic housings.
- Unbolt the flexible shaft coupling connecting the motor shaft to the ball screw or gearbox input hub.
- Support the motor body and remove the four mounting flange bolts from the machine frame.
- Slide the motor straight back off the mounting pilot. Do not strike the shaft end with a hammer to free it—shocks directly damage internal encoder glass disks.
- ⚠️ Note: Inspect the mechanical mounting face and shaft key for galling, corrosion, or oil leakage from nearby gearboxes before installing the replacement unit.
Stage 3: Installing the New Module (Estimated Time: 15 Minutes)
- Wear an ESD wrist strap grounded to the machine frame. Verify the model code matches MSMA041A1E.
- Align the keyway and carefully push the motor shaft into the coupling. Ensure the motor mounting pilot sits fully flush against the machine mounting plate.
- Insert and hand-tighten the four mounting bolts, then torque them in a cross pattern to specification (approx. 4.5 N·m).
- Torque the shaft coupling clamping screw to the manufacturer’s recommended setting.
- Reconnect power and encoder cables, making sure waterproof locking rings or connector latches fully engage.
- Self-Checklist: [ ] Flange bolts cross-torqued, [ ] Shaft coupling tight, [ ] Power/encoder connectors latched securely.
Stage 4: Power-On & Testing (Estimated Time: 15 Minutes)
- Perform an insulation test (500V Megger) between motor phase pins (U/V/W) and frame ground. Resistance must exceed 10 MΩ.
- Apply logic power to the servo drive while keeping the Servo-On line disabled.
- Check the driver display for encoder comms faults (e.g., Error 21). If clean, send a minimal jog command at low speed (50–100 RPM).
- Verify motor rotation matches commanded direction and listen for mechanical binding or abnormal acoustic noise.
- Ramp up to full production speed and monitor drive current draw to verify smooth operation under load.
- Frequently Asked Questions (FAQ)
Can I replace the MSMA041A1E with a newer MINAS A5 or A6 motor?
Yes, but not as a direct drop-in. Upgrading to a modern MINAS A6 motor (such as MSMF041A1A) requires replacing both the motor and driver together. Modern drivers use serial encoder protocols and different connector pinouts that are incompatible with original MINAS A feedback wiring.
What is the difference between MSMA041A1E and MSMA042A1E?
The key difference is the shaft and brake specification. The “041” designation indicates a 400W low-inertia motor with a keyed straight shaft without an internal electromagnetic holding brake. The “042” suffix designates an internal 24V DC holding brake built into the rear housing.
Is an insulation test safe to run on an motor?
You may perform a 500V DC insulation test only between the motor power phases (U, V, W) and the outer metallic frame ground. Never apply high-voltage Megger test leads to the encoder pins, as doing so will instantly destroy the sensitive encoder processing circuitry.
Why does my replacement motor throw an encoder communication error upon power-up?
Encoder errors (e.g., Error 14 or Error 21) are usually caused by bad cable shielding ground connections or loose connector pins. Ensure the encoder cable shield is grounded 360 degrees at the driver end. If replacing a motor on an aging machine, worn flex-cable tracks often cause intermittent signal loss.
Are these replacement motors original Panasonic inventory or aftermarket copies?
We supply genuine Panasonic OEM hardware. Surplus and refurbished units go through a multi-point SOP quality inspection—including physical winding resistance testing, high-voltage insulation verification, and continuous dynamic testing on a genuine Panasonic MINAS drive rack—before entering inventory.



