
 WhatsApp: +86 16626708626
 Email:
  Phone: +86 16626708626
Description
Key Technical Specifications
- Manufacturer: Saftronics
- Part Number: CA418
- Product Classification: PLC Module / Rack Component
- Board Function: Multiprocessor CPU and control logic board
- Form Factor: PCB unit for Saftronics legacy control equipment
- Status Indication: Onboard LED indicators
- Installation Location: Existing Saftronics chassis, rack, or control enclosure
- System Compatibility: Verify against the installed Saftronics assembly and original wiring documentation
- Weight: Approximately 0.61 lb, as listed by an industrial-parts distributor
- Configuration Requirements: Confirm hardware revision, connector arrangement, jumpers, and any address settings before installation
- Lifecycle Status: Legacy / obsolete industrial control component
- Replacement Strategy: Exact CA418 match preferred; do not assume another Saftronics board is electrically interchangeable
The available distributor information identifies the CA418 as a Saftronics PLC/machine-control module and PCB unit with multiprocessor CPU-board functionality and LED indication. Public listings do not provide a verified voltage rating, memory capacity, I/O count, protocol specification, firmware revision, or pinout. Verify those details from the original cabinet documentation, the removed board label, and OEM drawings before energizing a replacement.
Product Introduction
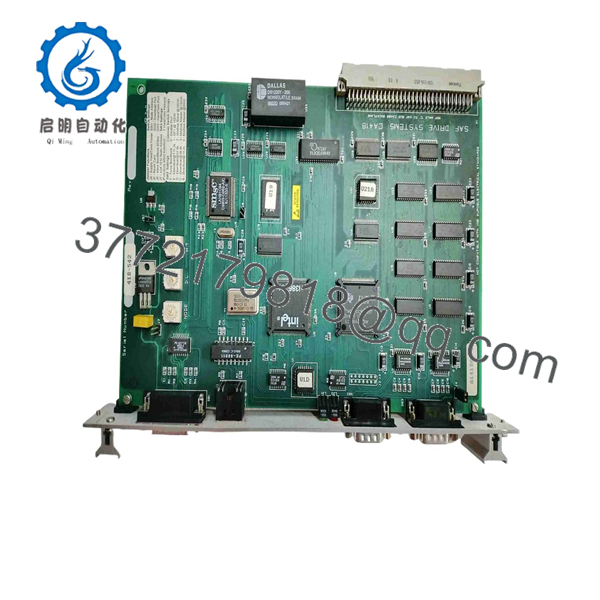
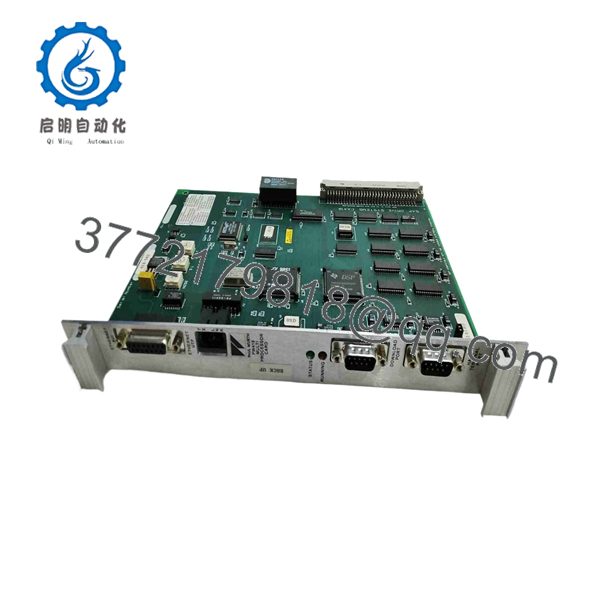
The Saftronics CA418 is a legacy multiprocessor CPU board used in Saftronics PLC and machine-control equipment. It installs as a PCB-level control component in an existing compatible rack, chassis, or cabinet assembly where the original CA418 has failed or where a site needs an exact spare for downtime coverage.
Buyers typically choose the CA418 when an exact board-level replacement avoids a larger controls retrofit. Match the full part number, physical connectors, board revision, LED layout, and installed-system wiring before purchase. This is an obsolete component, so actual stock and condition should be confirmed before issuing a purchase order.
CA418
CA418
Troubleshooting Quick Reference
| Symptom | Possible Cause | Relevance to This Part | Quick Check Method | Recommendation |
|---|---|---|---|---|
| No LEDs after power-up | Missing or low rack power; blown fuse; failed power supply | ❌ Low to medium | Measure the system supply at the rack input and board power connector using a Fluke 115 or equivalent meter; compare readings to the cabinet schematic | Check supply rails, fuses, and connector seating before condemning the |
| LEDs remain off while adjacent boards operate | Poor board seating; oxidized edge connector; failed | ✅ High | Isolate power, remove the board using ESD controls, inspect connector fingers and socket contacts, then reseat fully | If the issue follows the after reseating, arrange controlled replacement testing |
| Intermittent machine stops | Loose terminal, vibration, backplane contact issue, electrical noise | ⚠️ Medium | Check cabinet grounding, inspect board retainers, look for vibration damage, and review event records for repeatable timing | Do not replace the board until you rule out supply dips, loose wiring, and connector faults |
| Controller does not start after a replacement | Wrong board revision; jumper or switch mismatch; incompatible firmware or configuration | ✅ High | Photograph and record every jumper, DIP switch, connector position, and label on the removed board before installation | Match the original physical configuration exactly; request photos of the replacement board before shipment |
| Communication timeout or rack fault | Backplane connection issue; configuration mismatch; upstream controller problem | ⚠️ Medium | Inspect rack connectors, check controller diagnostics, and compare the old and replacement board identifiers | Verify the master controller and other rack cards before assuming failure |
| Output devices do not respond | Failed output card, field fuse, interposing relay, wiring fault, permissive logic condition | ❌ Low | Check adjacent I/O-card status LEDs; measure field supply at the output terminals; verify relay and fuse condition | Diagnose local I/O and field wiring first; a CPU board is not the first suspect |
| Board runs briefly, then faults | Weak power supply, excessive cabinet temperature, degraded board components | ⚠️ Medium | Monitor supply voltage during startup and under load; inspect enclosure temperature and ventilation | Confirm stable supply rails and cabinet cooling; replace only after those checks pass |
| Visible discoloration, corrosion, or burnt odor | Overheating, contamination, failed component, prior electrical event | ✅ High | Inspect under good lighting; compare with known-good board photos; do not energize if carbon tracking is visible | Remove from service and replace; inspect associated power supplies and load circuits for root cause |
❗ Firmware and revision mismatch: Document every revision marking before you pull the old . I have seen a technician swap what looked like the same control board, only to spend two days chasing a communication timeout caused by a subtle hardware or protocol revision change.
❗ Jumper and switch settings: Take a clear photo before touching anything. Seriously. Factory defaults may not match the installed node address, baud rate, termination, or logic configuration. Mirror the original board’s physical settings exactly.
❗ Connector and wiring fit: Do not wire from memory. Similar-looking legacy boards may use different pin assignments or grounding arrangements. Verify the cabinet drawing and connector designation before applying power.
❗ Power budget: Confirm every rack supply rail remains within its specified range during startup and normal machine load. Leave at least a 20% power-supply margin when calculating the complete control-rack load.
❗ ESD handling: Use a grounded wrist strap and an ESD-safe work surface. A static discharge can damage a legacy board without leaving visible evidence, then turn into an intermittent fault after installation.
If you are stuck, provide technical support with clear photos of both sides of the removed , all label and revision markings, the rack position, LED states, supply-voltage readings, and controller diagnostic logs. Keep these checks in mind and you will save yourself 90% of typical rework time.
Frequently Asked Questions
Is the Saftronics a direct replacement for my failed board?
It can be a direct replacement only when the installed unit is also marked and the connector layout, hardware revision, jumper settings, and application match. Do not treat a partial label match as proof of compatibility. For legacy controls, verify the original board’s photographs, chassis location, edge connectors, and cabinet drawings before ordering.
Is the obsolete?
Yes. The is a legacy Saftronics industrial control component, and supply normally depends on surplus inventory or tested used stock. That makes exact part-number confirmation important. If your process depends on this board, buying a verified spare for shelf stock may be more practical than waiting for an emergency failure.
Can I hot-swap a Saftronics board?
Do not assume it is hot-swappable. Unless the specific Saftronics system documentation explicitly permits live replacement, de-energize the control cabinet, verify absence of voltage, and follow site lockout/tagout procedures before removing or installing the board. Pulling a legacy PCB under power can damage the backplane, corrupt logic states, or create an uncontrolled machine condition.
Will I lose programming or machine settings when replacing the ?
Possibly. Available public listings identify the as a multiprocessor CPU board, but they do not verify whether the specific application stores logic, parameters, or retained data on the board, in another controller, or in removable memory. Back up all accessible software, record board markings, photograph DIP switches and jumpers, and save diagnostic data before removing the failed unit.
What should I verify before installing a replacement ?
Verify the exact label, board revision, component-side layout, edge connectors, rack slot, jumper positions, DIP-switch settings, supply rails, grounding, and associated controller diagnostics. Inspect the backplane socket for bent contacts or contamination. Then power up under controlled conditions and monitor LEDs, rack status, and machine permissives before returning equipment to production.
Is this unit New Surplus or Refurbished?
Condition must be stated against the actual unit offered. New Original / New Surplus means unused legacy inventory that may have been stored for years; confirm packaging condition, date codes, accessories, and serial-label photos. Refurbished (tested) means the unit has been previously used and functionally checked, but it is not factory-new. Ask for the condition statement, actual-item photographs, test report, and warranty terms before purchase.
Why can a cost less than buying directly from the factory?
The is a legacy item, so pricing often reflects secondary-market inventory rather than current OEM production. A lower price is not automatically a problem, but it should trigger practical questions: Is the item new surplus or refurbished? Is the listing photo the actual board? What test was performed? Is there a written functional warranty? Can the supplier provide revision and connector photos? Buy on those answers, not on price alone.



