WhatsApp: +86 16626708626
 Email:
 Phone: +86 16626708626
Description
Key Technical Specifications
- Device Type: Three-Phase AC Frequency Inverter
- Input Voltage Range: Three-phase 380 V to 500 V AC (−10% to +10%)
- Input Frequency: 50 / 60 Hz (±10%)
- Rated Output Power: 1.5 kW (2.0 HP) at 400 V
- Rated Output Current: 4.0 A
- Apparent Output Power: 2.8 kVA
- Switching Frequency: Variable (4 / 8 / 12 / 16 kHz)
- Control Modes: V/F control, V/F with slip compensation, CFC (Current Flux Control), and Servo (SERVO mode)
- Communication Options: Fieldbus interfaces (PROFIBUS, PROFINET, DeviceNet, EtherNet/IP via option cards)
- Operating Temperature: 0 to +40 °C (derating up to 55 °C)
- Enclosure Rating: IP20
- Dimensions (W x H x D): 105 mm x 315 mm x 207 mm
- Weight: 3.1 kg
Product Introduction
The SEW-Eurodrive MDX61B0015-5A3-4-0T is a digital frequency inverter from the MOVIDRIVE B modular automation series. Engineered for complex industrial drive applications, it operates asynchronous AC motors as well as synchronous servomotors across material handling conveyors, automated storage systems, and packaging machinery.
This drive features integrated motion control intelligence, flexible expansion card slots for fieldbus communication, and high overload capability. Maintenance teams select this unit for its precise positioning functionality and seamless parameter cloning via plug-in memory cards.
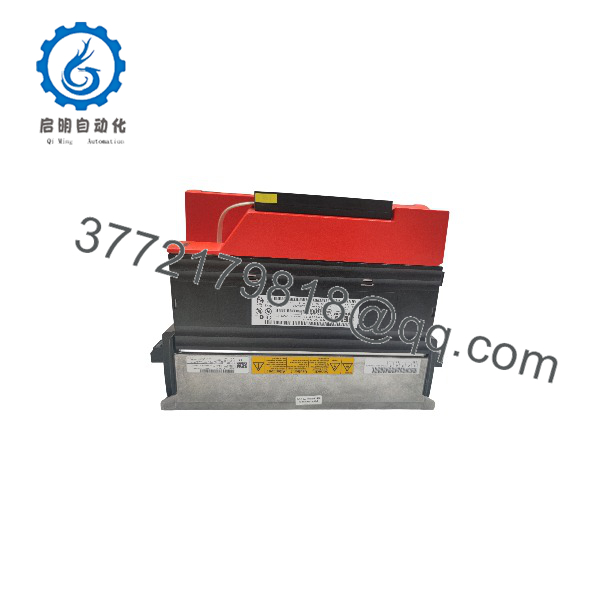
MDX61B0015-5A3-4-0T
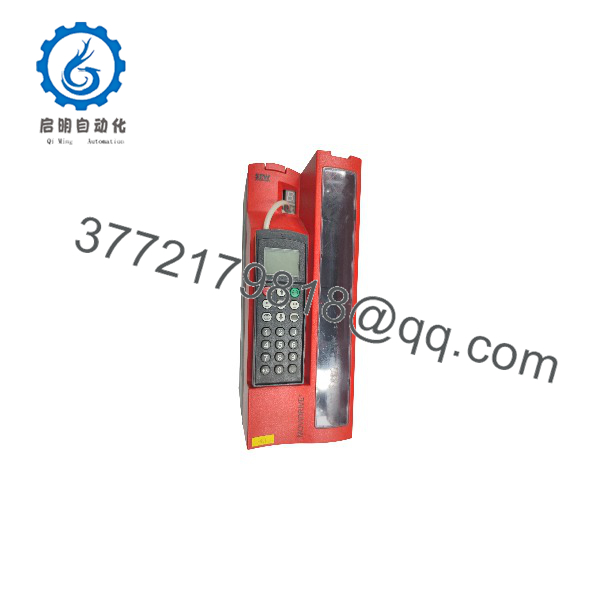
MDX61B0015-5A3-4-0T
Installation & Configuration Guide
Stage 1: Pre-Installation Preparation
- ⚠️ Safety First: Notify operations of drive downtime, execute Lock Out/Tag Out (LOTO) on the primary 400 V AC power feed, and wait at least 5 minutes for the internal DC bus capacitors to fully discharge before opening the terminal cover.
- Tools Required: ESD grounding wrist strap, flat-head and #1 Phillips screwdrivers, Digital Multimeter (Fluke 115 or equivalent), wire strippers, torque screwdriver.
- Data Backup: Transfer parameter sets from the old drive to the plug-in option memory card (IPOS / parameter module) before unseating the unit. Note motor nameplate specifications.
Stage 2: Removing the Old Unit
- Verify zero voltage across input terminals (L1, L2, L3) and DC bus terminals (+V, -DC) using a high-voltage multimeter.
- Clearly label all incoming power cables, motor leads, control wiring, and fieldbus connections before unhooking them.
- Release the mechanical mounting clips or unbolt the chassis from the control cabinet backplate.
- Inspect the panel mounting surface and cabinet air filters for dust accumulation or restricted airflow.
- Self-Check: Confirm all wires are labeled clearly. Keep the old inverter accessible until the replacement is commissioned.
Stage 3: Installing the New Unit
- Put on your ESD wrist strap and verify that the replacement part number on the nameplate matches
MDX61B0015-5A3-4-0Texactly. - Memory Card Transfer: Move the plug-in parameter storage module (or fieldbus option card) from the old unit into the corresponding slot of the new drive to retain pre-configured settings instantly.
- Mount the inverter securely onto the cabinet mounting rail or backplate, ensuring vertical alignment for optimal natural convection cooling.
- Terminate incoming 3-phase power to L1/L2/L3, motor leads to U/V/W, and ensure EMC shielding clamps make 360-degree contact with cable braids.
- Self-Check: Confirm that terminal screws are torqued correctly and control wiring is routed away from high-voltage power leads.
Stage 4: Power-On & Testing
- Pre-Power Check: Use a multimeter in resistance mode to confirm no short circuits exist between motor phases or from phases to ground.
- Power-On Steps:
- Close the upstream circuit breaker to energize the inverter input while keeping the mechanical load uncoupled if possible.
- Observe the front 7-segment display and status LEDs (Confirm normal initialization and absence of fault codes like
F-01orF-08). - Verify parameter settings via MOVITOOLS MotionStudio software if any custom tuning adjustments are required.
- Perform a low-speed jog test to check motor rotation direction and encoder feedback stability.
- ⚠️ Troubleshooting Note: If an overvoltage fault (
F-07) trips during deceleration, verify that the external braking resistor is properly wired and enabled in the drive parameters.
Frequently Asked Questions (FAQ)
Can this drive be hot-swapped under power?
Honestly, unplugging or replacing a MOVIDRIVE unit while the main 400V AC power feed is live will cause severe electrical arcing, destroy internal power semiconductors, and present a catastrophic safety hazard. Always de-energize and lock out the cabinet power supply before touching power terminals or pulling option cards.
Is this model obsolete, and is it genuinely new?
SEW MOVIDRIVE B inverters remain widely supported across global industrial infrastructure. Units designated as “New Original” or “New Surplus” are authentic factory-built hardware items that have never been placed into active industrial service, acquired from verified plant overstock or authorized warehouse inventory releases.
What is the direct replacement if this exact model is out of stock?
You must match the exact power rating (1.5 kW), voltage class (5 = 380–500 V AC), and device generation (MDX61B series). Substituting an incorrect size or series will cause communication mismatches with SEW MOVITOOLS software and violate drive sizing limits.
Will I lose my parameters when swapping the inverter?
Not if you transfer the plug-in parameter memory module from the old drive to the new unit. The parameter module stores all application data, motor settings, and IPOS positioning routines. If swapping the entire unit without the card, you must reload parameters via MOVITOOLS MotionStudio.
Why is your price lower than the OEM factory list price?
Surplus automation suppliers acquire brand-new excess inventory from factory overstock, plant design modifications, and canceled capital projects. Bypassing traditional multi-tier distribution channels allows us to offer maintenance teams immediate component availability at significantly reduced price points.