
 WhatsApp: +86 16626708626
 Email:
  Phone: +86 16626708626
Description
Key Technical Specifications
| Parameter | Value |
|---|---|
| Model | BI01 |
| Manufacturer | Beijing Consen Technologies Co., Ltd. |
| System | TSxPlus V2.0 |
| Product Type | Bus Interface Module |
| Hardware Designation | BI01-A |
| Firmware Revision Documented | BI01-A-V002 |
| Firmware Revision Documented | BI01-A-V003 |
| Firmware File | BI01_IMG_U36_02.jic / BI01_IMG_U36_03.jic |
| Logic Device | FPGA |
| Function | Bus interface |
| Certification Report | 968/FSP 1454.02/22 |
| Certification Body | TÜV Rheinland Industrie Service GmbH |
| Application | TSxPlus safety-related control architecture |
| Manufacturer Location in Certification Record | Beijing, China |
| Communication Protocol | Not publicly specified in the certification revision list |
The TSxPlus certification revision record is particularly useful for procurement because it explicitly labels BI01 as the Bus Interface Module and records both V002 and V003 revisions.
Important identification warning: Other web listings use the designation BI01-A-V001 for unrelated industrial modules and describe Modbus, RS-232, RS-485, and digital/analog I/O functions. Those claims should not be merged with the Beijing Consen TSxPlus without checking the physical nameplate.
Product Introduction
The Beijing Consen is the Bus Interface Module used in the TSxPlus V2.0 safety-system architecture. TÜV Rheinland’s certification revision record identifies -A as the bus-interface hardware and documents FPGA firmware revisions -A-V002 -V003.
For replacement work, the firmware revision matters. A carrying V002 firmware should not automatically be replaced with a V003 unit without confirming the installed TSxPlus configuration and certified hardware/firmware combination.
Installation & Configuration Guide
Stage 1: Pre-Installation Preparation — Approximately 10 Minutes
⚠️ Safety First: TSxPlus is associated with safety-related automation. Place the affected system in its approved maintenance state before removing . Follow the site’s lockout/tagout procedure and the applicable safety-system bypass procedure.
Tools Required
- ESD wrist strap
- Appropriate screwdriver
- Digital multimeter
- Wire/connector labels
- Smartphone or camera
- TSxPlus system documentation
- Existing configuration and firmware records
Data Backup
- Record the complete nameplate.
- Photograph the module before removal.
- Record the hardware revision.
- Record the installed firmware revision if the system diagnostic software provides it.
- Photograph all connectors and cable routing.
- Record the existing system configuration.
- Confirm whether the installed unit uses -01-A-V003 firmware.
⚠️ The V002 and V003 revisions are explicitly documented in the TSxPlus certification revision record. Do not treat firmware revision as a cosmetic difference.
Stage 2: Removing the Old Module — Approximately 5 Minutes
- Confirm that the safety system is in the authorized maintenance condition.
- Isolate the applicable power according to the TSxPlus maintenance procedure.
- Verify that the module is de-energized.
- Photograph the installed and every connection.
- Label connectors before disconnecting them.
- Release the module’s retaining mechanism.
- Remove without applying force to the backplane or connector.
- Inspect the mating connector for bent contacts, contamination, or mechanical damage.
- Keep the original module in an ESD-safe location.
⚠️ Do not discard the original . Its hardware and firmware markings may be required to resolve a compatibility problem during commissioning.
Stage 3: Installing the New Module — Approximately 5–10 Minutes
- Put on a grounded ESD wrist strap.
- Verify that the replacement is marked .
- Confirm the hardware designation is compatible with the installed TSxPlus configuration.
- Compare the connector arrangement with the removed module.
- Check the firmware revision before installation where possible.
- Insert the module carefully into its designated position.
- Ensure the connector seats fully.
- Secure the module mechanically.
- Reconnect all cables using the photographs and wiring documentation.
- Perform a final visual inspection.
Self-Checklist
- identification verified
- hardware revision checked
- Firmware revision documented
- Connector positions match
- Module fully seated
- Retaining hardware secured
- ESD precautions maintained
- Original module retained
Stage 4: Power-On & Testing — Approximately 10–15 Minutes
- Confirm the installation against the TSxPlus documentation.
- Check the applicable power rails before energizing.
- Restore power according to the approved procedure.
- Observe module status indicators.
- Check the TSxPlus diagnostic interface for module recognition.
- Verify the detected hardware revision.
- Verify the firmware revision.
- Check bus/interface diagnostics.
- Confirm that no unexpected system fault is present.
- Perform the approved safety-system functional test.
- Remove any authorized maintenance bypasses only after the system has passed testing.
- Document the installed revision and test results.
⚠️ Do not substitute a gener” module simply because the part number appears similar. Online sources contain multiple unrelated products using the designation. The TSxPlus certification record specifically identifies as a bus-interface module.
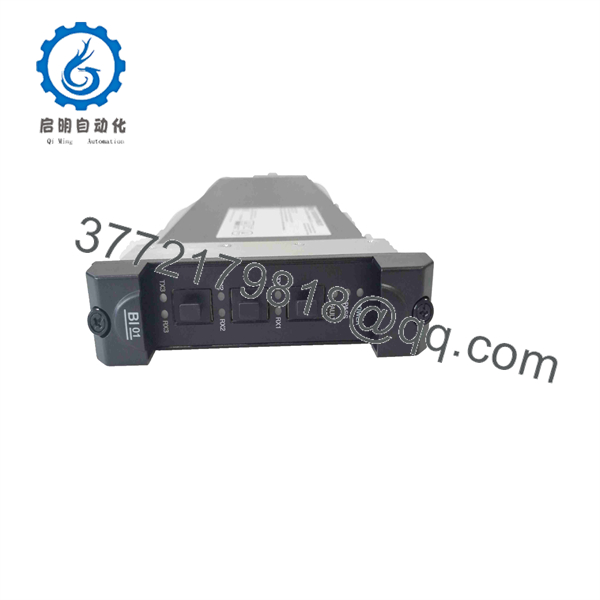
BI01
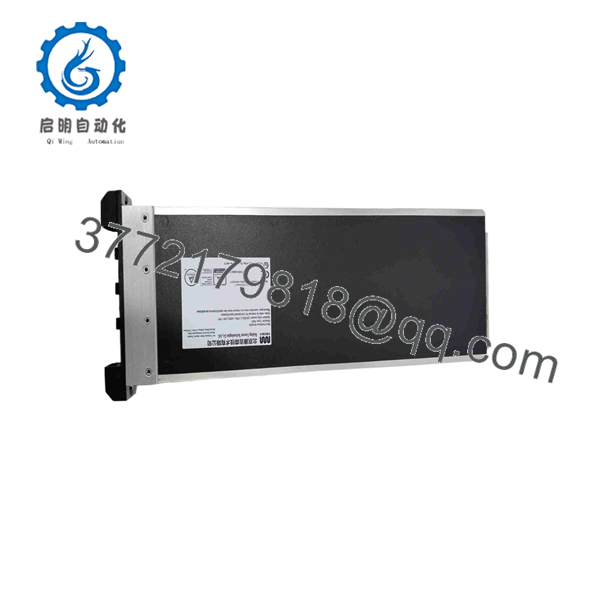
BI01
Frequently Asked Questions (FAQ)
Q1. What is the Beijing Consen ?
The is the Bus Interface Module in the Beijing Consen TSxPlus V2.0 system. The TÜV Rheinland revision record identif specifically as a bus-interface module.
Q2. Is a digital input module?
Not necessarily. The TSxPlus identified in the certification documentation is a Bus Interface Module. Some third-party websites use the same designation for unrelated digital-input products, so the complete model and system association must be checked.
Q3. What firmware versions are associated with ?
The TSxPlus V2.0 revision record documents V002 and V003. The associated FPGA image files are listed as BI01_IMG_U36_02.jic and BI01_IMG_U36_03.jic, respectively.
Q4. Can I replac- w-?
Do not assume direct interchangeability. Both revisions appear in the TSxPlus certification revision record, but the correct replacement depends on the installed system’s certified configuration. Verify the existing firmware and hardware revision before ordering.
Q5. Is obsolete?
The available certification documentation confirms revisions within TSxPlus V2.0, but it does not establish a current OEM lifecycle status. Therefore, I would not label the part obsolete solely from its age. Check current Beijing Consen documentation or obtain confirmation against the installed system revision.
Q6. Why are some websites listing completely different specifications for ?
Because is not a sufficiently unique commercial identifier by itself. Third-party listings use for different automation products, including modules described as digital-input or mixed I/O devices. For the TSxPlus product, the authoritative identification in the certification record is , Bus Interface Module.
Q7. What should I provide when ordering a replacement?
Provide the complete marki hardware revision, installed firmware revision, TSxPlus system version, and photographs of the nameplate and connectors. If available, provide the existing certification or configuration record as well. This avoids receiving a different product that happens to share the designation.



