
 WhatsApp: +86 16626708626
 Email:
  Phone: +86 16626708626
Description
3. Key Technical Specifications
| Parameter | Value |
|---|---|
| Model Number | H4893P4882 |
| Manufacturer | Harland Simon (UK) |
| Product Category | PLC Unit / Control System Module |
| Series | H4893 Series / Intella Series |
| Compatible Models | H4893P4677, H4893P4670, H4893P4673, H4893P4050 |
| Platform | Harland Simon Intella |
| Application | Industrial automation, Process control, System integration |
| Mounting Type | Rack-mounted / Chassis insertion |
| Operating Temperature | 0°C to +55°C (industrial standard) |
| Storage Temperature | -20°C to +70°C |
| Humidity | 5% to 95% RH (non-condensing) |
| Power Requirements | Standard industrial 24 V DC or backplane powered |
| Communication | Proprietary Intella bus architecture |
| Dimensions | Standard rack-mount format |
| Weight | Approx. 0.4 kg |
| Status | Obsolete / Legacy (End-of-Life) |
4. Product Introduction
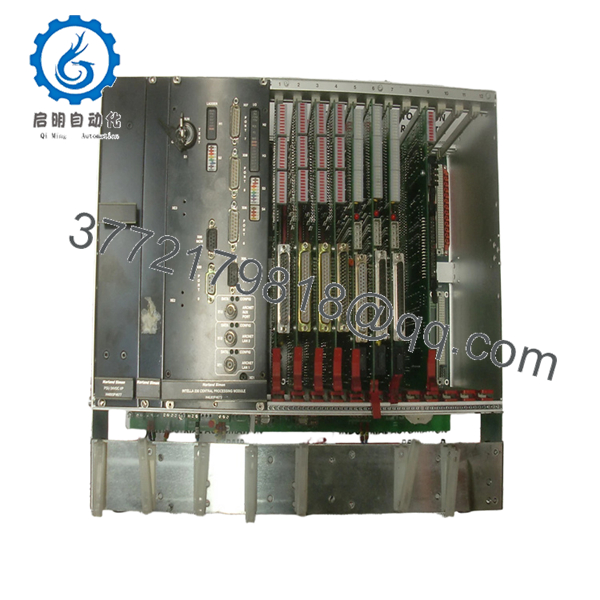
The Harland Simon H4893P4882 is a control unit module designed for the Intella series of industrial automation systems. Manufactured by Harland Simon—a UK-based specialist in industrial control systems—this unit serves as an integral component within the H4893 series control architecture. It is commonly deployed in manufacturing plants, process industries, and utility operations where Harland Simon’s Intella control platforms were implemented.This unit provides specific control or interface functionality for legacy installations requiring spare parts to maintain operational continuity. While Harland Simon has transitioned to newer control platforms, the H4893P4882 remains essential for facilities running established Intella infrastructure. It operates alongside other H4893 series modules such as the H4893P4677 power supply and H4893P4670 speed monitor to form complete control systems. Engineers select this module for its proven field reliability and direct compatibility with existing Intella rack configurations.
- H4893P4882
5. Installation & Configuration Guide
Stage 1: Pre-Installation Preparation (10 minutes)
⚠️ Safety First: Notify operations of planned downtime. Verify the Intella system is in a safe state. Lock out/tag out (LOTO) all power sources to the rack. Wait 5 minutes for capacitor discharge on the backplane before handling any modules.Tools Required:
- ESD wrist strap (grounded)
- PH1 Phillips screwdriver
- Digital multimeter (Fluke 115 or equivalent)
- Wire labeling tape or markers
- Smartphone/camera (for documentation)
Data Backup:
- Export all running control logic to removable media or network storage
- Document current node addresses, communication settings, and system configurations
- Photograph all DIP switches, jumpers, and terminal wiring layouts before removal
Stage 2: Removing the Old Unit (5 minutes)
- Remove the front bezel or protective cover if present.
- Label and disconnect all wiring from the front terminal block. Do not force connectors—they should release with gentle pressure.
- Release the rack locking tabs (typically top and bottom) and pull the module straight out to protect backplane pins.
- Inspect the backplane slot for bent pins, dust accumulation, or corrosion. Clean with compressed air if necessary.
- ⚠️ Note: Keep the old unit for reference until the new one is fully operational. Do not discard until commissioning is complete.
Stage 3: Installing the New Unit (8 minutes)
- ESD prep: Verify your wrist strap is properly grounded to the rack chassis.
- Configuration Clone (Critical): Replicate all DIP switches and jumpers from your reference photo. Pay special attention to:
- Node address settings
- Bus termination resistors (if applicable)
- Communication baud rate selectors
- Insert the H4893P4882 into the rack slot. Push firmly until both locking tabs engage with an audible click. Ensure proper seating—no gaps between module and backplane.
- Reattach wiring using torque-appropriate screwdriver. Do not overtighten terminal screws.
Self-Checklist:
- [ ] DIP switch positions match reference photo exactly
- [ ] All wiring secured and labeled correctly
- [ ] Rack locking tabs fully engaged
- [ ] No loose hardware inside the chassis
Stage 4: Power-On & Testing (7 minutes)
Pre-Power Check: Use your multimeter to verify no shorts on the 24V backplane rail before applying power.Power-On Steps:
- Power up the rack only (keep field devices isolated initially).
- Observe LED indicators on the H4893P4882:
- Green RUN/OK = Normal operation
- Red ERR/FAULT = Fault condition
- Flashing LEDs = Boot sequence or communication handshake
- Connect via Intella programming software. Verify:
- Firmware version matches expected revision
- Node ID is correctly recognized on the network
- Communication handshake successful
- Download backup logic if required.
- Perform dry-run testing before bringing field devices online.
⚠️ Troubleshooting Note: If the ERR LED remains solid red, suspect a firmware revision mismatch or incorrect DIP switch configuration. If no communication is established, verify network cabling, termination resistors, and switch port settings.
6. Frequently Asked Questions (FAQ)
Q: Can I hot-swap the H4893P4882 while the system is powered?
A: No. This is not a hot-swappable module. Attempting to remove or insert the unit while power is applied can damage the Intella backplane, corrupt the firmware, or destroy the module entirely. Always perform a controlled shutdown and wait for capacitor discharge before handling. I’ve seen maintenance teams try to “quick swap” these units during production—resulting in blown backplane traces that took entire control systems down for days.
Q: Is the H4893P4882 obsolete, and is your stock genuinely new?
A: Yes, this model is officially obsolete from Harland Simon. Our inventory consists of new surplus stock—units manufactured during the original production run but never deployed. These are factory-sealed or tested units stored in climate-controlled conditions. We also offer refurbished units that have undergone full functional testing prior to shipment. Each unit ships with a detailed test report and 1-year warranty.
Q: What is the function of the H4893P4882 within the Intella system?
A: The H4893P4882 is designated as a “UNIT” module within the H4893 series. Based on its part number classification alongside the H4893P4677 (power supply) and H4893P4670 (speed monitor), it likely serves as a specialized control or interface unit—possibly for communication, I/O processing, or system coordination functions. For precise functional specifications, consult your Intella system documentation or contact us with your application details.
Q: What is the direct replacement if the H4893P4882 is out of stock?
A: Compatibility depends on your specific Intella system configuration. Other H4893 series modules such as the H4893P4673 (central processing module) or H4893P4050/P4051 (Intella 300 processors) may provide alternative functionality depending on your application requirements. However, these are not direct mechanical or functional equivalents. Contact us with your system specifications for cross-reference verification before ordering alternatives.
Q: Will I lose my programming logic when I replace this unit?
A: Yes—unless you have a backup. The H4893P4882 stores configuration and operational parameters in onboard memory that may be lost when power is removed. You must download your configuration from the engineering workstation after installation. If you don’t have the original source files, extract them from the old unit before removal using Harland Simon’s programming tools. I’ve seen plants lose critical system configurations because someone pulled the module without backing up first.
Q: Why is your price lower than the OEM factory list price?
A: Harland Simon no longer manufactures this part, so “factory list price” is largely academic. Our pricing reflects the new surplus market reality—unused inventory acquired from plant closures, system upgrades, and distributor liquidations. We test every unit and pass the savings from bypassing traditional distribution channels directly to you. You’re buying proven hardware at market rates, not paying inflated prices for obsolete catalog listings.
Q: What firmware version should I request?
A: Document your current firmware revision before ordering. The H4893 series had several firmware iterations that affected communication timing and module compatibility. If your system runs older firmware, a newer unit may require updates to other rack modules as well. When in doubt, request the exact revision currently installed—or be prepared to update the entire system’s firmware suite.


