
 WhatsApp: +86 16626708626
 Email:
  Phone: +86 16626708626
Description
Key Technical Specifications
| Parameter | Value |
|---|---|
| Model | KEBA SR161 |
| Alternate Designation | SR-161 / SR161/A |
| Part / Assembly Variant | SR-161/A |
| Hardware Type | Analog I/O control card |
| Board Function | Analog signal interface and processing |
| Typical Platform | KEBA / Engel machine control systems |
| Typical Application | Injection molding machinery |
| Known Board Identification | 1904D-0 on documented variants |
| I/O Type | Analog I/O |
| Mounting | Internal control cabinet / controller card slot |
| Weight | Approximately 0.56 kg for one listed SR-161 assembly |
| Lifecycle | Legacy / discontinued according to secondary-market documentation |
The available evidence identifies the KEBA SR161 primarily as an analog I/O/control card used in Engel injection molding equipment. A documented SR161 variant is identified as 1904D-0, while other listings identify the assembly as SR161/A.
I would not use the more detailed 1 GHz ARM, 16DI/16DO, CAN, and 4AI/4AO specifications sometimes published online for this product without checking the physical nameplate. Those specifications appear to describe a different SR161 interpretation and conflict with the documented KEBA/Engel analog-card references.
Product Introduction
The is a legacy analog I/O control card associated with KEBA/Engel industrial machine-control systems, particularly Engel injection molding equipment. Available documentation and industrial listings identify it as an analog I/O board rather than a conventional rack-mounted PLC I/O module.
The important purchasing detail is revision matching. , SR-161, /A, and board-level identifiers such as 1904D-0 should not be treated as interchangeable without comparing the installed board. For legacy Engel equipment, the machine controller generation and board revision can determine compatibility.
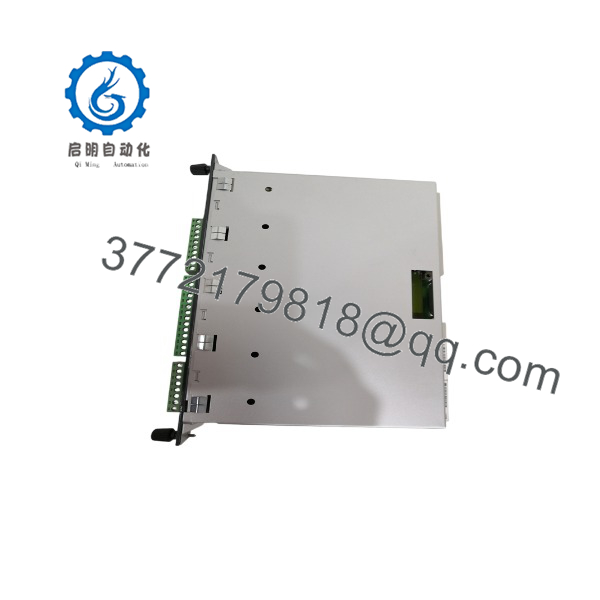
SR161
Installation & Configuration Guide
Stage 1: Pre-Installation Preparation — Approximately 5 Minutes
⚠️ Safety First: Notify operations, place the injection molding machine in its approved safe state, and follow the site’s LOTO procedure. Wait for stored energy to dissipate before accessing the control cabinet.
Tools Required:
- ESD wrist strap
- PH1 screwdriver
- Digital multimeter
- Wire labels
- Smartphone/camera
- Appropriate terminal screwdriver
Data Backup:
- Record the exact identification from the existing board.
- Photograph the complete board before removal.
- Photograph all connectors and wiring.
- Record any revision, serial number, and secondary board markings.
- Record the machine controller model and software version.
- If the machine provides a controller backup facility, save the current machine configuration.
⚠️ Do not order based on “” alone when a machine is production-critical. Photograph the board label and connector arrangement. The available market contains multiple descriptions for this model number.
Stage 2: Removing the Old Module — Approximately 5 Minutes
- Confirm the machine is electrically isolated.
- Remove the cabinet cover required to access the controller.
- Photograph every connector before disconnecting anything.
- Label connectors if their positions are not mechanically keyed.
- Release the board retaining hardware.
- Disconnect the board carefully.
- Pull the PCB straight out without twisting it against the connector.
- Inspect the mating connectors for bent contacts, oxidation, contamination, or loose pins.
Keep the original beside the replacement. If the replacement has a different PCB revision or connector arrangement, stop and compare the two boards before installation.
Stage 3: Installing the New Module — Approximately 5 Minutes
- Put on the grounded ESD strap.
- Confirm the replacement is the same variant as the removed board.
- Compare PCB markings, connectors, mounting holes, and revision information.
- Check the board for shipping damage.
- Insert the board carefully into its mating connector.
- Secure the PCB using the original mounting hardware.
- Reconnect each cable according to the photographs and machine documentation.
- Confirm every connector is fully seated.
Self-Checklist:
- identification matches
- PCB revision checked
- Connector positions verified
- No bent pins
- Board fully seated
- Retaining hardware secured
- Wiring restored
Stage 4: Power-On & Testing — Approximately 10–15 Minutes
Pre-Power Check:
- Inspect the board and connectors for accidental shorts.
- Verify supply wiring against the machine electrical drawings.
- Check the controller supply voltage before reconnecting sensitive field circuits.
- Confirm no loose conductor can contact the PCB.
Power-On Sequence:
- Energize the control system according to the machine manufacturer’s procedure.
- Check controller diagnostics.
- Verify that the analog I/O associated with the is recognized.
- Compare displayed analog values against known machine conditions.
- Check pressure, position, speed, or other analog feedback channels relevant to the machine.
- Perform a controlled machine dry run.
- Verify that analog values remain stable during machine movement.
⚠️ Do not calibrate immediately just because the displayed value differs from the old board. First determine whether the difference comes from board revision, sensor wiring, scaling parameters, or the machine configuration.
Technical Pitfalls Worth Checking
❗ 1. Board Revision Mismatch
This is the first thing I would check on a legacy Engel controller. One seller identifies an as , while another identifies an analog card as 1904D-0. These identifiers should be compared against the installed board before purchase.
❗ 2. Connector Position
Analog boards are particularly unforgiving of connector mistakes. A connector that physically fits does not prove that the channel assignment is identical. Photograph the original board before removal.
❗ 3. Analog Scaling
After replacement, check engineering-unit scaling. A raw analog value can look reasonable while the displayed pressure, position, or speed is wrong because the controller configuration has changed.
❗ 4. ESD Damage
This is an exposed PCB, not a ruggedized field enclosure. Use a grounded wrist strap and handle the board only by its edges. Avoid touching ICs, connector pins, and exposed traces.
❗ 5. Incorrect Product Identification
There is a particularly important trap with . Some online sources describe a completely different KEBA architecture with an ARM processor and integrated digital/analog I/O, while documented Engel/KEBA sources identify as an analog I/O card. Do not buy from a specification sheet alone. Match the physical PCB, revision, connectors, and machine controller.
Frequently Asked Questions (FAQ)
Can the KEBA be hot-swapped?
I would not treat it as a hot-swappable module. The is documented as a board-level control/I/O card used inside machine-control equipment, not as a generic plug-and-play field I/O module. Shut down and isolate the machine before removing it unless the specific Engel/KEBA service documentation explicitly authorizes energized replacement.
Is the KEBA obsolete?
It appears to be a legacy/discontinued product. Radwell lists as discontinued by the manufacturer, while current secondary-market suppliers continue to list used //A boards.
Is an analog I/O card or a PLC CPU?
For the KEBA/Engel relevant to these legacy machine-control applications, available industrial references identify it as an analog I/O/control card. One documented board is specifically identified as KEBA Analog Circuit Board 1904D-0.
What does /A mean?
appears as an assembly variant/designation of the . A secondary-market listing explicitly identifies the product as Keba SR 161/A, Part Number /A. Before substitution, compare the /A board against the installed unit rather than assuming the suffix has no electrical significance.
Will replacing the erase my machine program?
The physical replacement of an I/O/control board does not inherently mean the machine’s complete control program disappears. However, the board may interact with machine-specific configuration and calibration data. Back up the controller configuration before replacement, and verify analog scaling and calibration after startup.
Why are some listings described as new while others are used?
is a legacy part, so secondary-market condition varies. Current listings include used boards, while other suppliers advertise replacement stock.
For procurement, specify the condition explicitly: Factory Sealed, New Original/New Surplus, or Refurbished and Tested. For a refurbished , request the actual test procedure and test report.
What should I send a supplier before ordering an ?
Send a clear photograph of the entire PCB, nameplate/label, revision marking, connector side, and any visible part number such as 1904D-0. Also provide the Engel machine model and controller generation if available. This is much safer than ordering from the three-character model number alone.



