
 WhatsApp: +86 16626708626
 Email:
  Phone: +86 16626708626
Description
3. Key Technical Specifications
| Parameter | Value |
|---|---|
| Display Size | 12.1 inch diagonal |
| Display Type | TFT LCD (active matrix) |
| Resolution | 800 x 600 (SVGA) |
| Brightness | 400 cd/m² typical |
| Backlight Type | CCFL (cold cathode) |
| Touchscreen | Resistive analog (optional on some variants) |
| Input Voltage | 24 VDC nominal (18-32 VDC range) |
| Power Consumption | 35 VA typical |
| Interface | VGA, DVI, RS-232 (touch), USB |
| Front Bezel | IP65 (dust-tight, low-pressure water jets) |
| Rear Chassis | IP20 |
| Operating Temperature | -15°C to +55°C |
| Storage Temperature | -25°C to +70°C |
| Humidity | 95% non-condensing |
| Vibration | IEC 60945 marine approved |
| Mounting | Flush panel mount |
| Dimensions (W x H x D) | 320 x 260 x 75 mm |
| Cutout Dimensions | 300 x 240 mm |
| Weight | 4.2 kg |
| Certifications | DNV-GL, ABS, Lloyd’s Register type approval |
4. Product Introduction
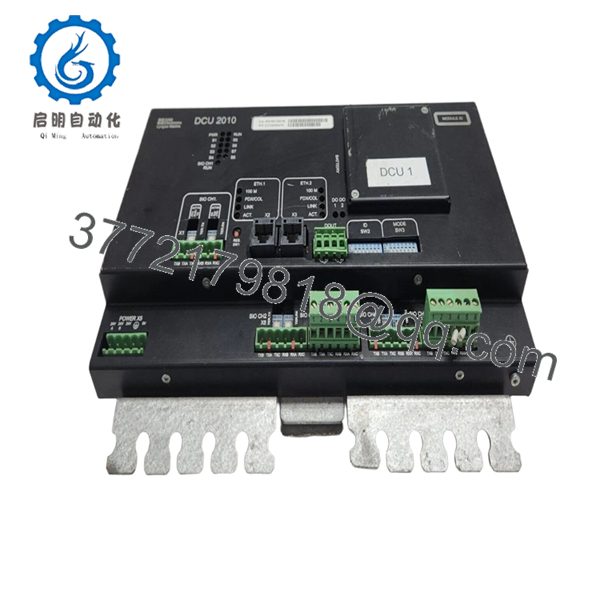
The Sam Electronics DCU2010 (model 810.003.260-06) is a marine-certified 12.1″ color TFT display unit designed for bridge consoles, engine control rooms, and dynamic positioning (DP) workstations. This unit serves as a local operator interface for Sam Electronics 6000/7000 series DCS systems, displaying alarms, machinery parameters, and navigation data.
The DCU2010 chassis carries a rugged IP65 front bezel rated for marine bridge environments — salt spray, vibration, and humidity won’t kill it. Field experience shows these CCFL-backlit units typically run 30,000-50,000 hours before backlight dimming becomes noticeable. The 810.003.260-06 revision includes improved EMI filtering over earlier revisions, which helps when mounted near VHF radios or thruster drives.

- DCU2010 810.003.260-06
- DCU2010 810.003.260-06
5. Installation & Configuration Guide
Total estimated time for trained technician: 30 minutes (excluding software configuration)
Stage 1: Pre-Installation Preparation (8 minutes)
⚠️ Safety First: Notify bridge/ECR of display outage. Isolate 24VDC supply at the breaker panel. Lock-out/tag-out (LOTO) if the display shares power with critical controls. Wait 2 minutes for internal backlight inverters to discharge.
Tools Required:
- ESD wrist strap
- Phillips #2 screwdriver
- 2.5mm flathead screwdriver (for terminal blocks)
- Wire labels
- Multimeter (verify 24V supply before connecting)
- Panel cutout gasket (included with new unit — do not reuse old gasket)
Data Backup & Documentation:
- Photograph the mounting position and all rear connectors before removal.
- Document the DIP switch settings (if present) for CAN/Profinet addressing.
- Record any custom brightness or contrast settings from the OSD menu.
Stage 2: Removing the Old Unit (7 minutes)
- Disconnect the 24VDC power connector. Label it clearly.
- Disconnect video cable (VGA or DVI). Label.
- Disconnect touchscreen USB/serial cable. Label.
- Remove mounting clamps from the rear (typically 8-12 screws).
- Carefully push the display forward out of the panel cutout.
- Remove the old mounting gasket and clean the panel surface.
⚠️ Critical: Do not pull on the LCD glass. Support the display from the metal chassis. The glass separates from the adhesive if you pry it.
Stage 3: Installing the New Unit (10 minutes)
- ESD prep: Grounded wrist strap. New units are sensitive to static through the rear connectors.
- Inspect the new DCU2010:
- Verify the model matches: 810.003.260-06.
- Check for any cracked LCD or damaged rear connectors.
- Verify the CCFL backlight tubes are intact (no dark bands).
- Install new gasket on the display rear, aligning it with the bezel groove.
- Insert the display into the panel cutout from the front. Hold it in place.
- Install rear mounting clamps. Torque evenly. Do not overtighten — warping the chassis cracks the LCD.
- Critical — Connector verification:
- DCU2010 uses a 4-pin terminal for 24VDC. Polarity: Pin 1 (+24V), Pin 2 (GND).
- Some vessels use an 8-pin M12 connector instead. Verify which version you have before wiring.
- Reconnect all cables in reverse of removal.
Self-Checklist:
- Gasket seated correctly
- Mounting clamps tightened evenly (no LCD distortion)
- 24V polarity verified
- All connectors fully seated and locked
Stage 4: Power-On & Testing (5 minutes)
Pre-Power Check:
- Multimeter on DC voltage range. Measure at the display’s power input terminals: 22-26 VDC.
- No short between +24V and GND.
Power-On Steps:
- Close the 24VDC breaker.
- The DCU2010 powers up automatically (no hard power switch on most units).
- Observe LEDs:
- Green LED (PWR) = 24V present.
- Amber LED (SIG) = Valid video signal detected.
- Red LED (ERR) = Internal fault or over-temperature.
- The display should show the boot screen (Sam Electronics logo) within 3 seconds.
- If connected to a DCS CPU, the main machinery overview should appear within 15 seconds.
⚠️ Troubleshooting Notes:
| Symptom | Likely Cause | Fix |
|---|---|---|
| No power, PWR LED off | 24V supply missing or polarity reversed | Check breaker, swap wires |
| Power on, amber LED flashes | No video signal | Check VGA/DVI cable, confirm source is outputting |
| Dim display, flickers | CCFL backlight failing or inverter board issue | Backlight tubes are user-replaceable (part #810.003.261) |
| Touchscreen not responding | USB cable disconnected or driver missing | Check connection; some DCU2010s require serial touch (COM port mapping) |
| Red ERR LED solid | Internal temperature >70°C or fan failure | Check rear ventilation. Fan is replaceable (40mm, 12V). |
Stage 5: Software Configuration (if replacing a failed unit)
For vessels where the DCU2010 stores local parameters:
- Enter OSD menu (press buttons on rear bezel or use remote OSD cable).
- Verify:
- Brightness: 80% (new CCFLs are brighter than aged ones)
- Contrast: 70%
- Input source: Auto-detect or manual (VGA/DVI)
- If the unit uses touchscreen over RS-232, verify baud rate matches the host PC (typically 9600, 8N1).
6. Frequently Asked Questions (FAQ)
Q1: Can I replace my failed DCU2010 with a standard industrial monitor?
A: You can, but it’s not recommended. The DCU2010 includes marine approvals (DNV-GL, ABS) for bridge mounting. A standard monitor lacks salt spray sealing, vibration damping, and EMI filtering. I’ve seen standard monitors fail within 6 months in an ECR. The mounting cutout is also non-standard (300x240mm). You’d need an adapter plate.
Q2: Is the DCU2010 810.003.260-06 a touchscreen model?
A: Not all are. The -06 suffix indicates a specific configuration. Check the rear label for “Touch” or look for a USB or RS-232 port labeled “Touch.” If your old unit had touch and the new one doesn’t, you’ll need to verify the part number. We stock both variants.
Q3: The display is dim. Can I replace the CCFL backlight tubes?
A: Yes, and you should. CCFLs dim with age. After 30,000 hours, brightness drops by 50%. Replacement tube kit: Sam Electronics part #810.003.261. This is a 1-hour bench job. Wear gloves — the tubes contain mercury. If you’re not comfortable, send the unit to us for refurbishment.
Q4: Will I lose any DCS configuration when I swap the display?
A: No. The DCU2010 is a pure display — no CPU, no configuration memory. The DCS logic remains in the main controller. However, some vessels use the DCU2010’s OSD to store screen layout preferences. Those will reset to factory defaults. Take photos of the OSD settings before removal.
Q5: Why does your price vary from other suppliers?
A: This is a discontinued marine display (Sam Electronics ended production in 2019). Our units are new original surplus — factory sealed, never installed. Other suppliers may sell refurbished units (used, cleaned, retested) at lower prices, or genuine new old stock at higher prices. We are transparent: ours are new surplus, tested, with 1-year warranty.
Q6: Can I run this display on 110VAC with an external adapter?
A: Yes, but use a marine-grade 110VAC to 24VDC power supply (e.g., Mean Well, 60W minimum). Do not use a consumer-grade wall wart — they fail from shipboard vibration. We recommend the Sam Electronics PSU2010 (part #810.003.280) or a PULS ML60.242.
Q7: What’s the direct replacement if this is out of stock?
A: Sam Electronics recommends the DCU2020 (12.1″ LED-backlit, same cutout). However, the DCU2020 uses a different mounting clamp design and requires a firmware update on the DCS CPU. The LED version draws less power (25W vs 35W) and lasts 50,000+ hours. We can quote a retrofit kit with adapter cables.
Q8: Do you test these units before shipping?
A: Yes. Every DCU2010 runs through our 9-point functional test:
- Visual inspection (no cracks, no corrosion)
- 24VDC power-on test (2 hours)
- Backlight brightness measurement (400 cd/m² ±10%)
- Pixel check (no stuck pixels on dark/white screens)
- Touchscreen calibration test (if equipped)
- VGA input test (pattern generator)
- DVI input test
- Serial touch loopback test
- 2-hour thermal soak at 50°C


